
With the published attendee list, you can offer registrants a way to publish a few things about themselves on your event website. Our published attendee list can help you create a strong networking environment for your registrants that will have them coming back year after year.
WHAT IS IT?
The published attendee list will live as a tab on your event website. When activated, registrants will have the ability to elect whether or not they are displayed on the published list (which can be viewed by anyone with access to your event page).
Depending on how you configure the registration form, registrants may then opt in or out of displaying key pieces of information about themselves, such as their company name and mobile phone number.
If the user decides to be included on the published attendee list, their name and headshot will appear in the attendee list tab on your event website. When a site and/or mobile app visitor taps or clicks the attendee's name on the list, the attendee's full profile will show [whichever pieces of information that attendee decided to publish].
SETUP
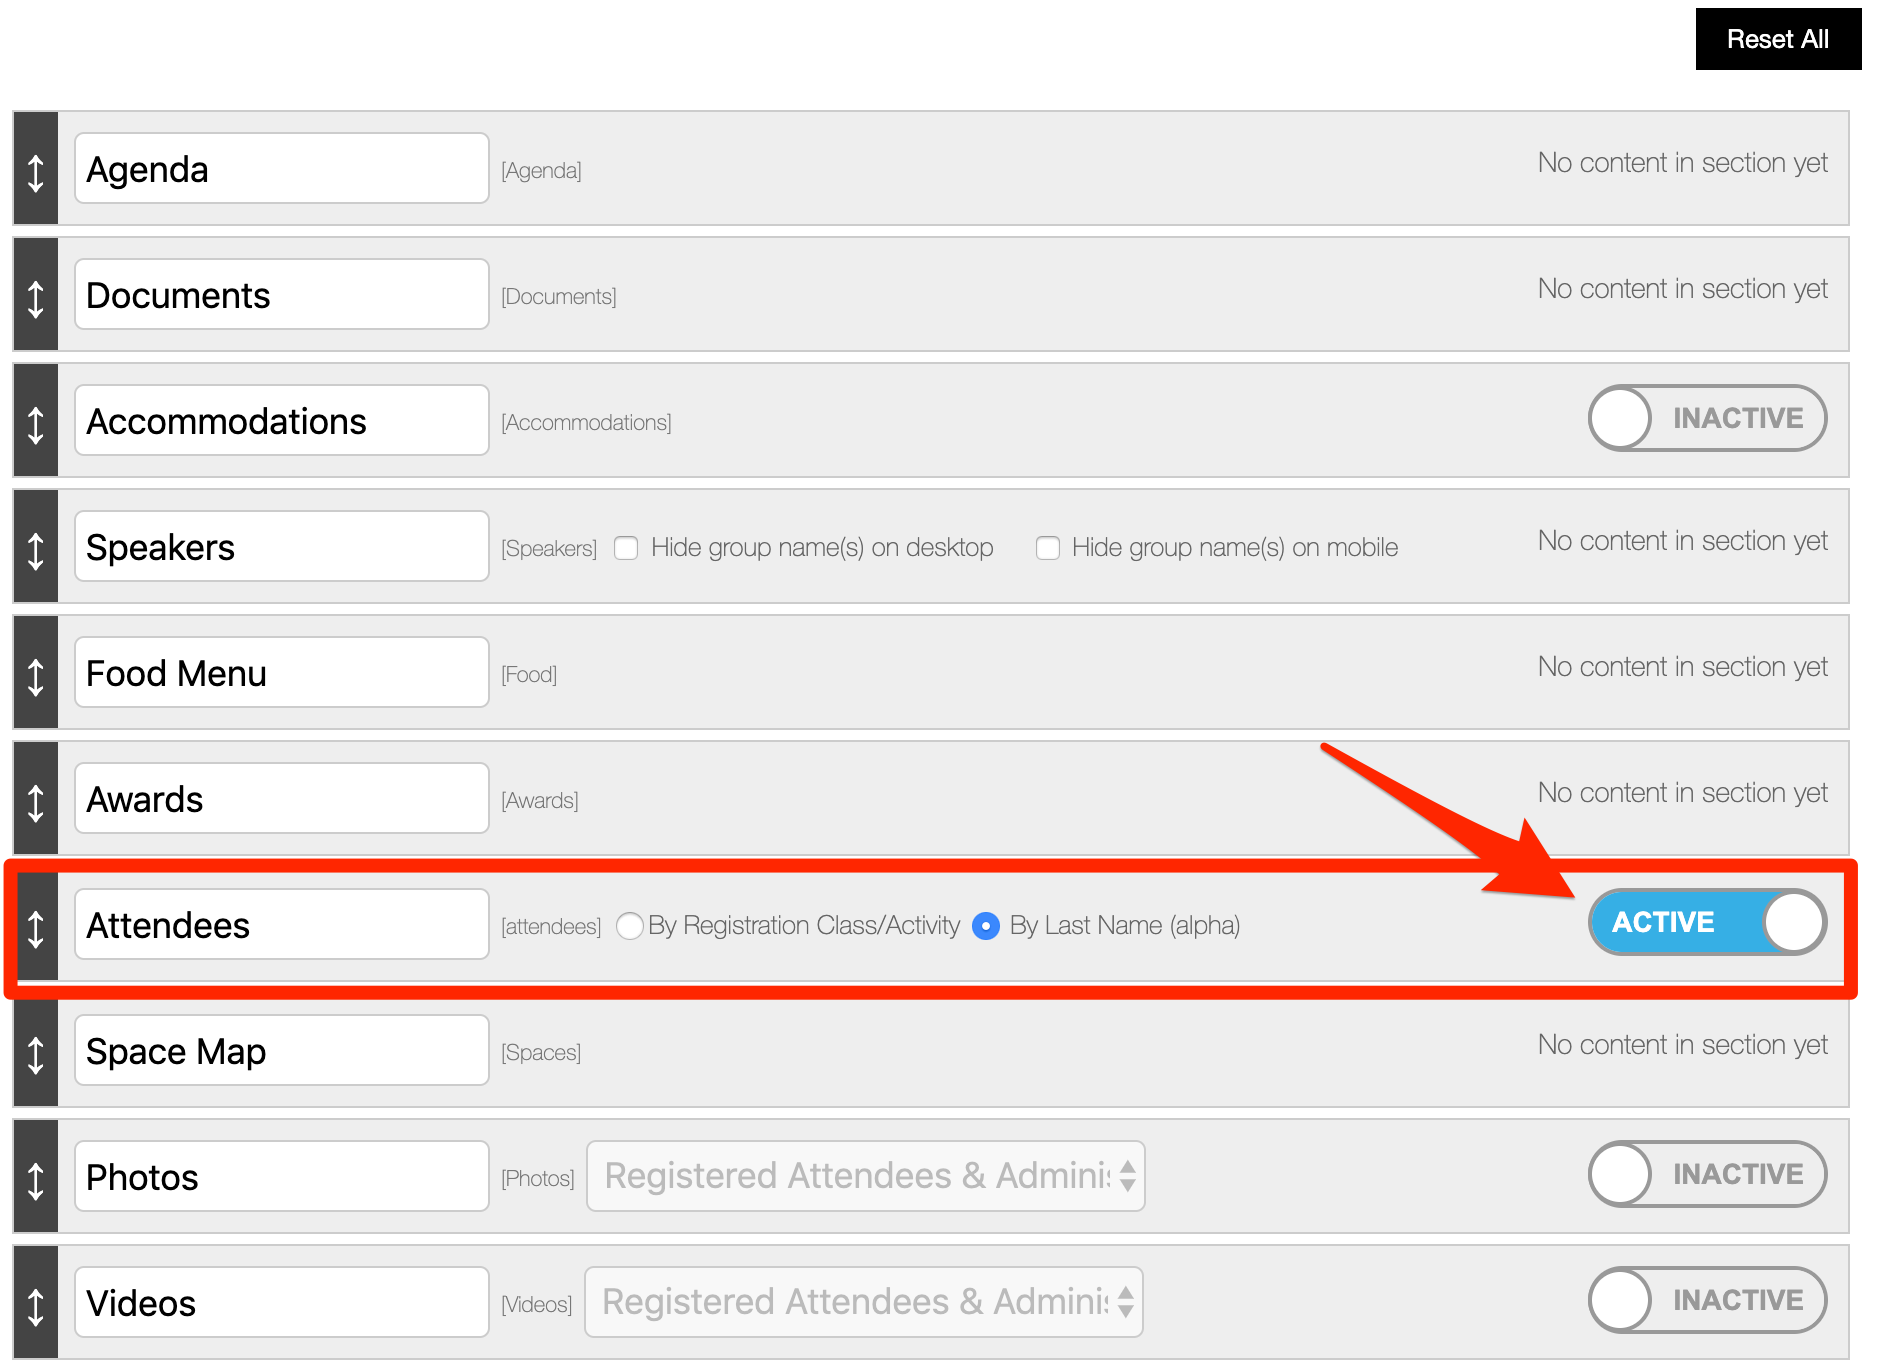
The first step in activating the published attendee list is activating the tab on your event website.
CONTENT ACTIVATION
Navigate to the WEBSITE section of the Event Builder and click on Content Activation on the left. Find the ATTENDEE tab, then flip the activation switch. You'll also see you can rename this tab as you wish (as long as it doesn't match the name of another tab!).
TAP TO DISPLAY
Now that the published attendee list is activated for the event, you'll have the ability to activate certain registration form prompts for display on the published attendee list. Let's take a look.
Navigate to the REGISTRATION tab in the Event Builder, then click Registration Form on the left. In the FORM PROMPTS editor, scroll down, you'll see a "Tap to Display" checkbox next to specific prompts.
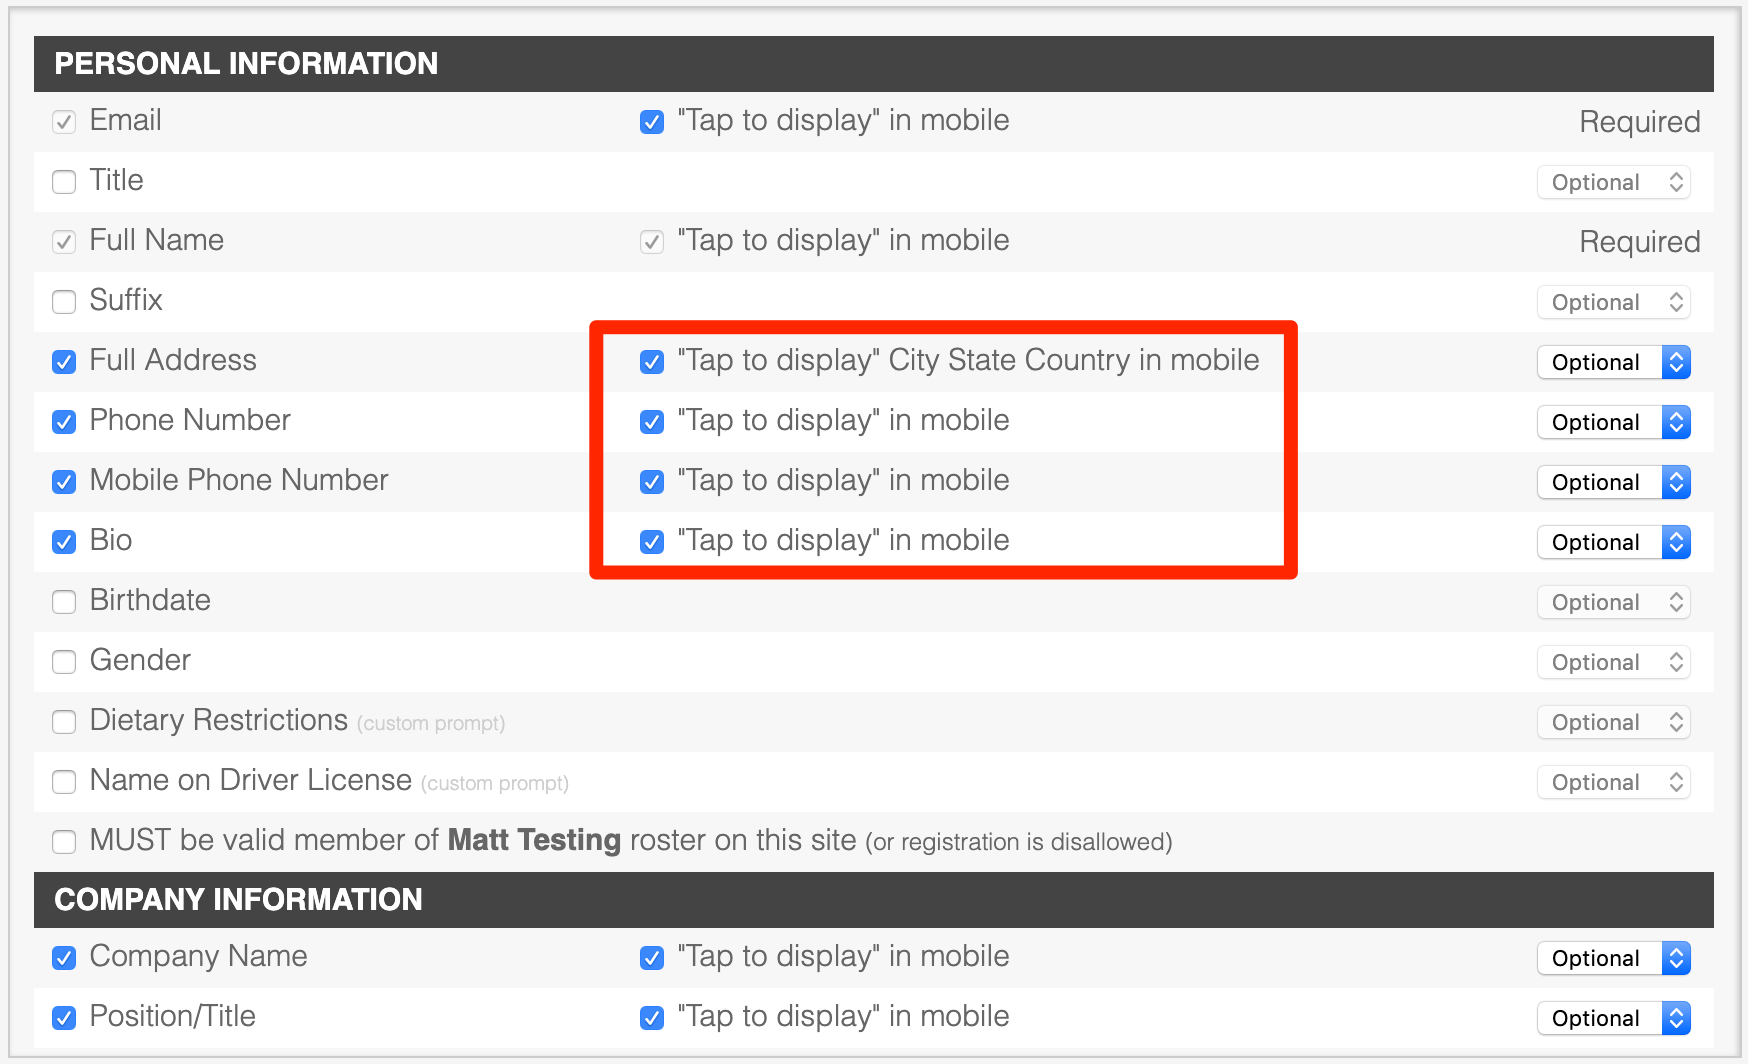
These prompts are designated for display on the published attendee list. When the "Tap to Display" box is checked for any prompt, you are allowing the registrant to decide if they'd like to add that particular piece of data to their published attendee profile [on the published list].
AVATAR UPLOAD
Our system allows you to activate a portal for uploading a headshot within the registration form. In the Registration Form tool, scroll below the prompt selection box and you will see an "Upload Avatar" setting. Click the OPTIONAL radio button to activate this feature:
![]()
Keep reading to see how the avatar upload presents to the user during a live registration.
HOW IT FUNCTIONS
Now that the published attendee list is activated for the event, let's take a look at how registrants interact with the opt in during registration.
REGISTRATION OPT IN/OUT
The published attendee opt in preferences will display in the very first section of the registration form (called "PERSONAL INFORMATION"), at the bottom:
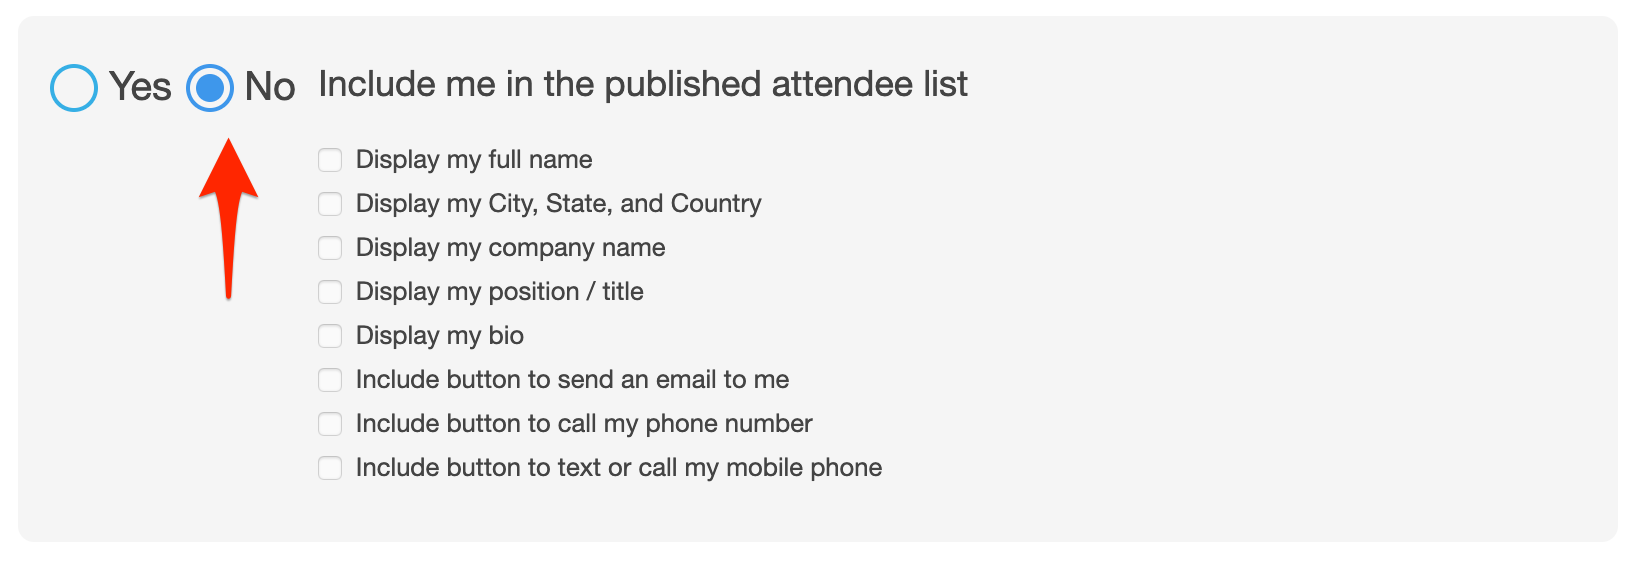
Currently, you will see that this particular registrant is opted OUT of being displayed on the attendee list. When opted out, the registrant will not be able to check any of the individual display checkboxes below.
QUICK TIP: in this scenario, we see that the default opt in setting is NO. In other words, registrants are automatically opted out of being displayed; this is to protect the registrant's privacy.
However, as an event admin, you have the ability to override the default setting. Navigate to your Event Dashboard and click the MANAGE ORGANIZATION tab. Then, click the Registration Defaults tab in the left menu:

You'll see "Published Attendee List Opt In" at the very top of the page, with two options. The first option is the default (automatically opts all registrants out until they manually opt themselves in).
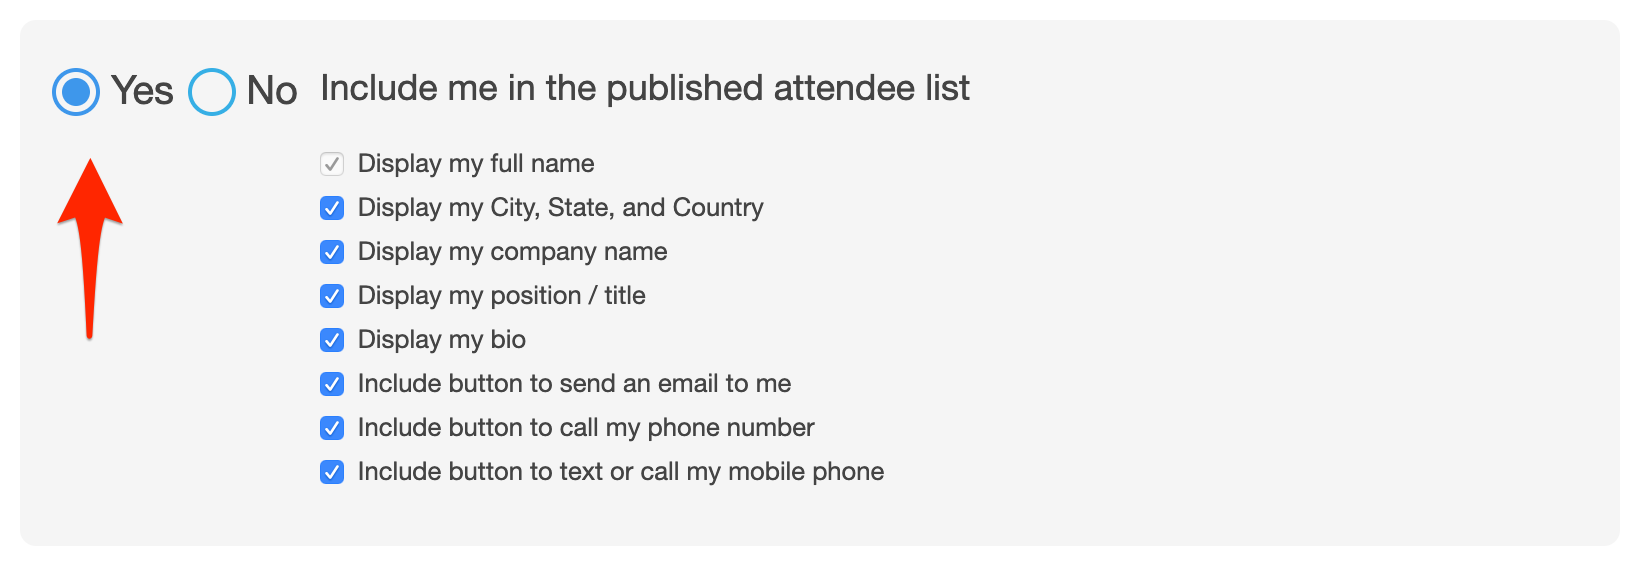
The alternative option is a manual override that allows the admin to automatically set each registrant as opted in by default.
Once opted in, the registrant will have the ability to set their individual profile display settings. You'll notice that not only can a registrant display basic information about them, they can also display buttons for calling their phone number or sending them an email.
REGISTRATION AVATAR UPLOAD
As the registrant proceeds to the next section of the registration form, they will be presented with an upload portal for a personal headshot.
![]()
The system will allow you to upload and frame your headshot for an optimized display on the desktop and mobile sites.
HOW IT DISPLAYS
Once the registration process is complete, registrant [if opted in] will display within your published attendees tab on your event website.
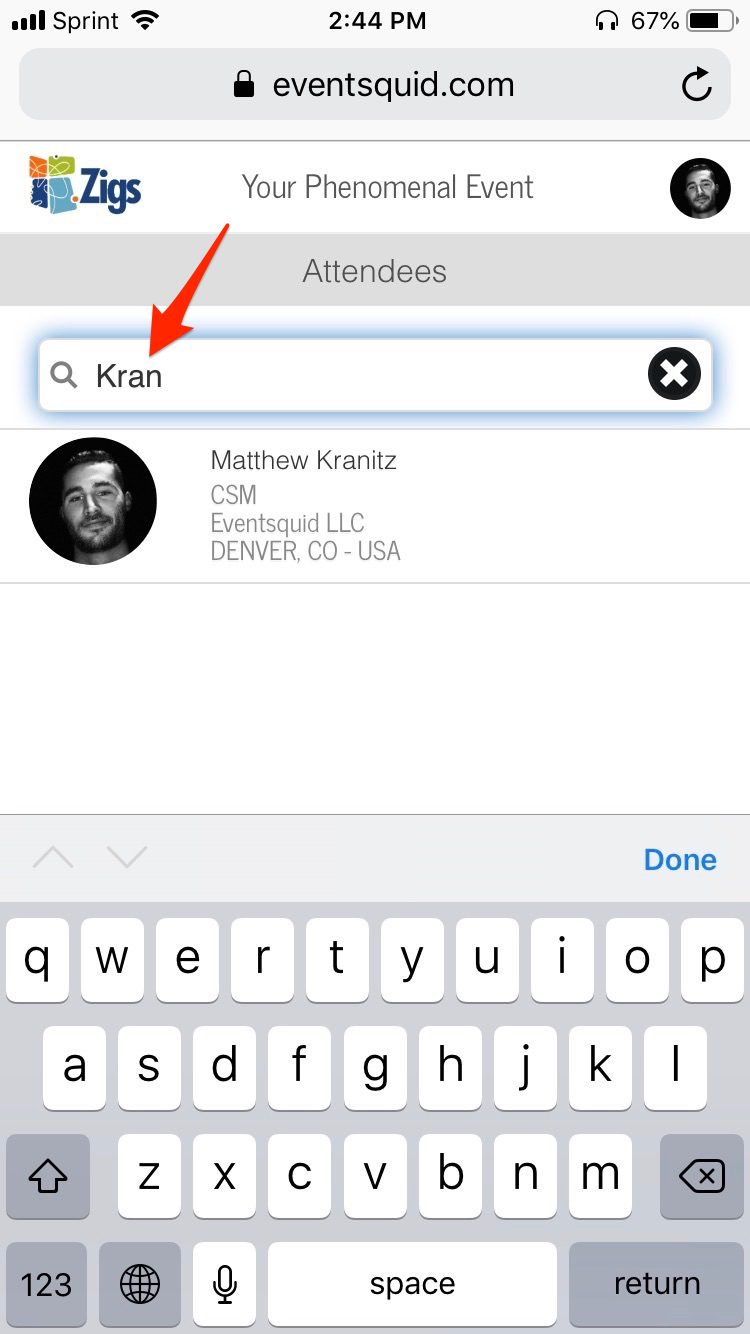
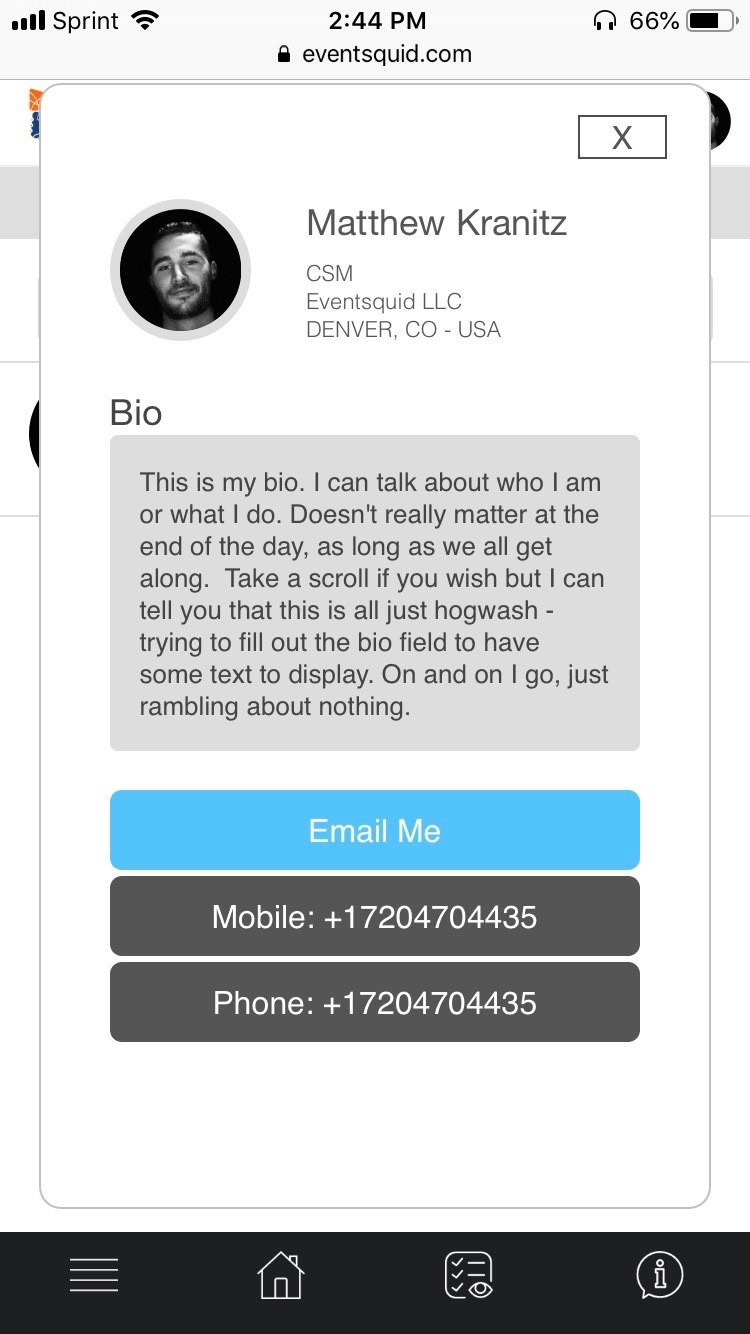
Both the mobile and desktop published attendee lists offer a search functionality. Tapping/clicking on a registrant in the list will open their profile and display the information that that registrant opted in to display to the public.
MOBILE DISPLAY
See below an example of the mobile searchable attendee list and public attendee bio:
MODIFYING ATTENDEE BIO SETTINGS
Initial registration is not the only point at which the registrant can set their display preferences for the published attendee list. Both the registrant and event admin alike can modify these settings after the user is fully registered.
ADMIN SETTINGS
The admin is able to modify a registrant's display settings. First, access the Event Dashboard and open the Registered Attendees list for your event. Select the registrant's name, then click PERSONAL PROFILE on the left side:

From this screen, the admin can change not only the overall opt in preference (i.e. display on the published attendee list or not), but the individual data display settings as well.
Click the SHOW/HIDE DETAILS button to expand/collapse the individual data display settings for that registrant's public attendee bio.
MY ACCOUNT SETTINGS
The user also has their own ability to modify their published attendee list display settings. As a user, simply login to the Eventsquid platform, then....
- Click your name in the upper right corner
- Select MY EVENTS from the dropdown
- Find the event name then click the DETAILS button
- Select the MODIFY MY INFORMATION link
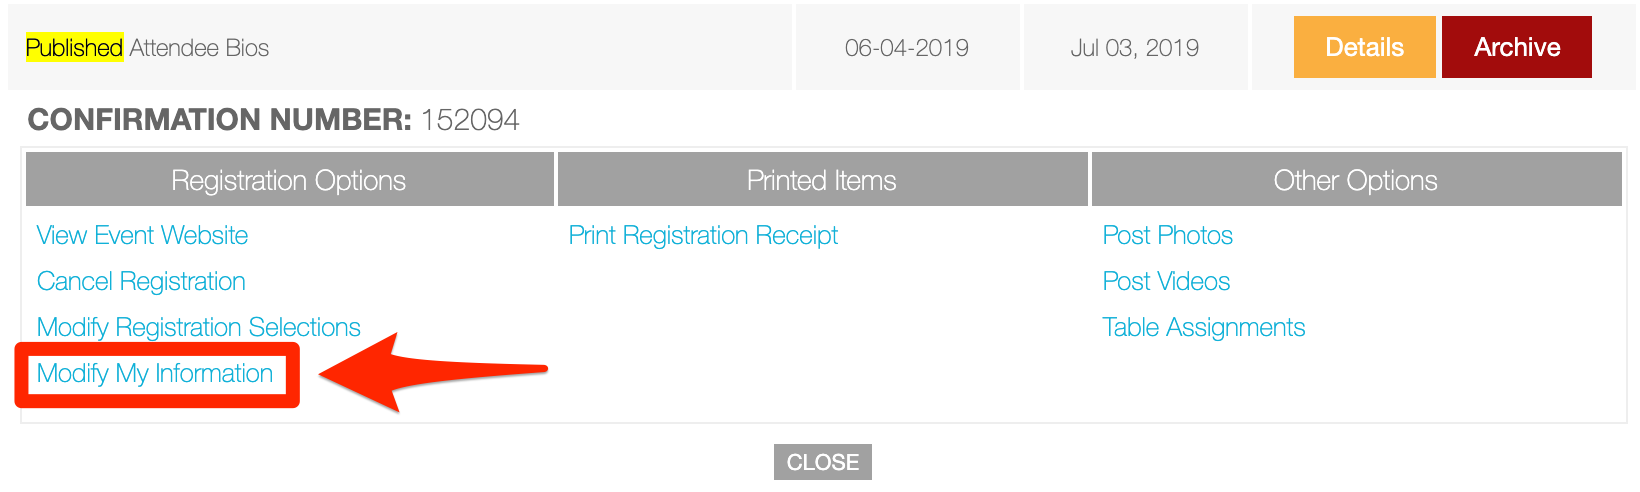
From there, the user will see a similar window with the published attendee bio display control options.