Eventsquid's registration tools are very flexible and customizable. As such, you can use them across a wide variety of applications.
One application of our core registration tools is volunteer sign up.
In this article, we'll walk you through a few key tips to setting up an effective volunteer registration form that is easy to use and captures the right information from your volunteers.
Ultimately, our recommendation is to create a Custom Profile made especially for volunteers, then use prompts and items accordingly to capture the right data.
CUSTOM PROFILES
First, we need to generate a custom form for volunteers. This allows you to create a registration pathway especially for volunteers amidst other registration forms you have activated for your main registrant types.
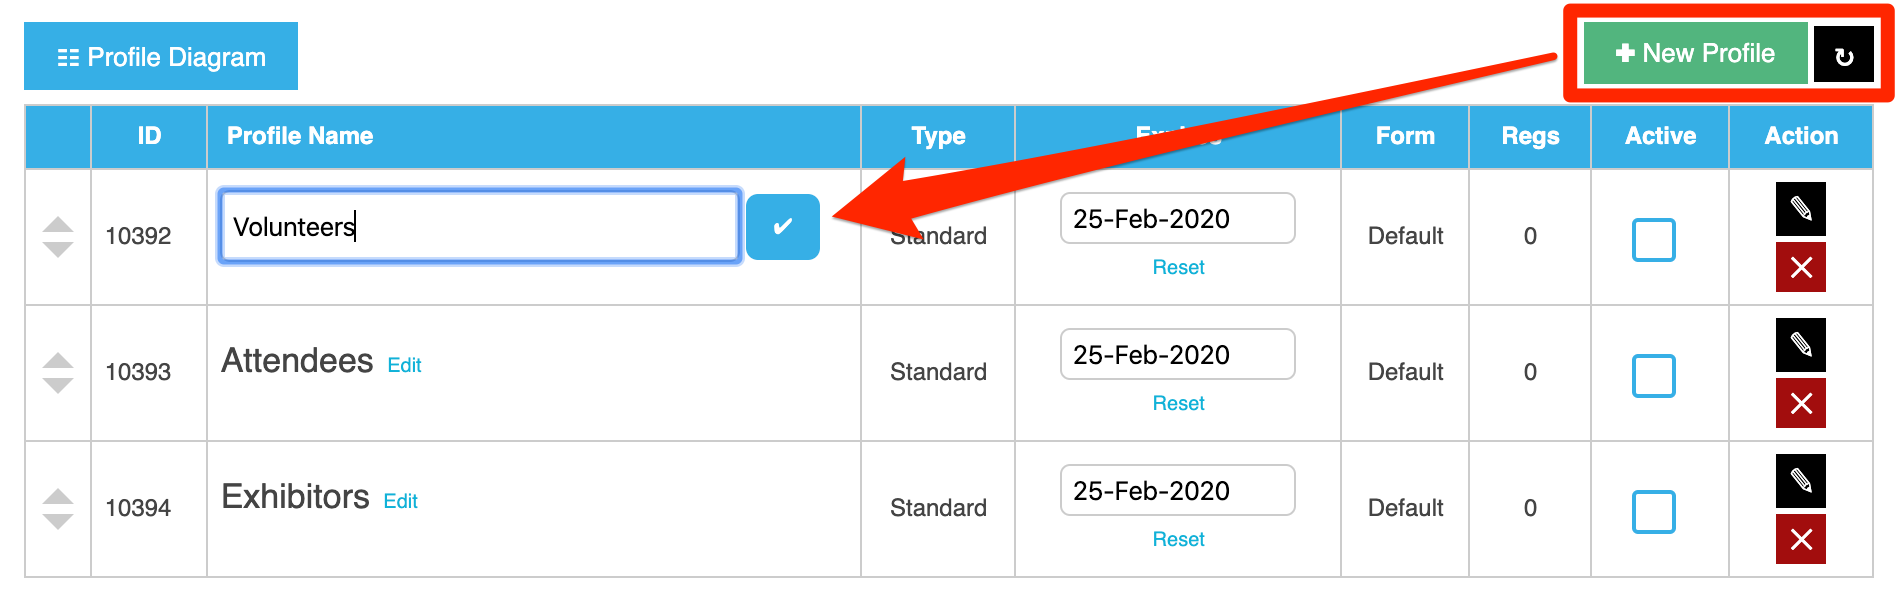
Enter the Event Builder, then select the Custom Profiles tool on the left. Click the New Profile button in the upper right, then click the small edit to change the name of the profile as desired:
CUSTOMIZE PROFILE PROMPTS
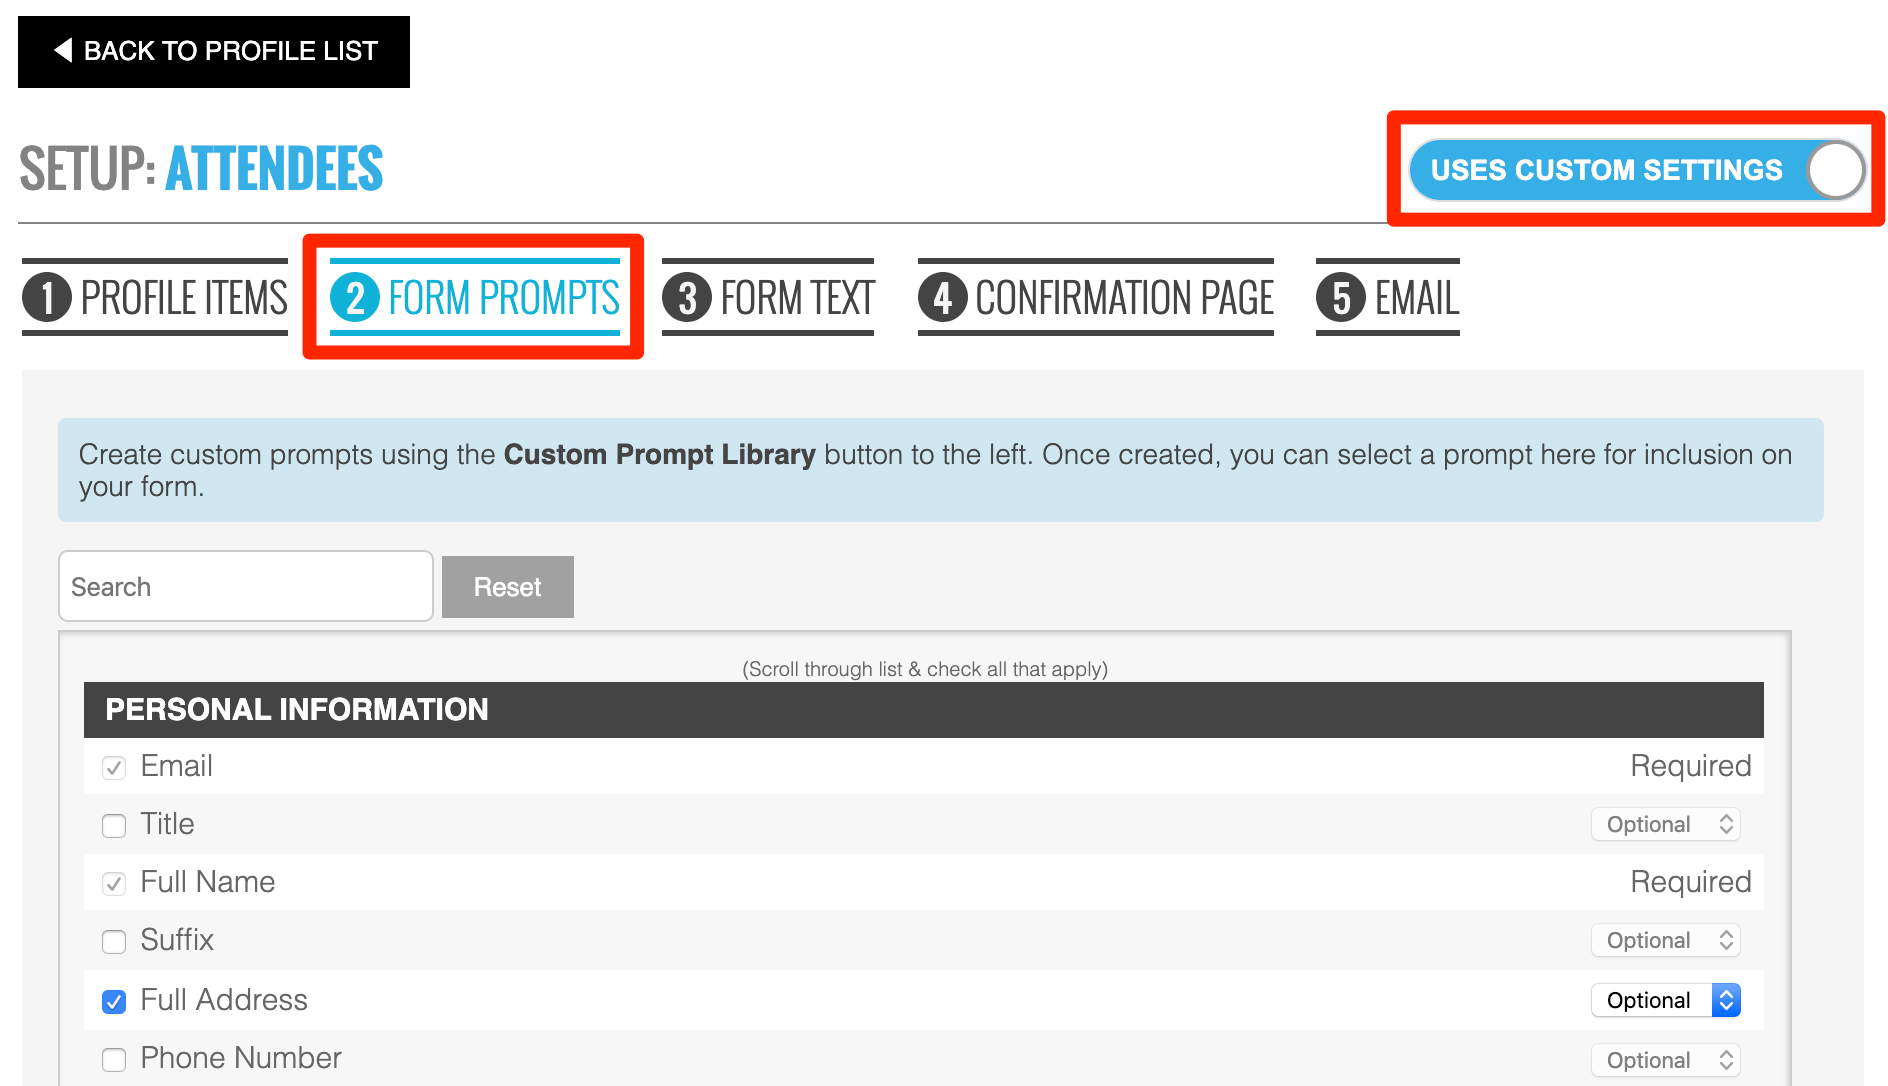
We can use form prompts to ask volunteers as many or as little questions as needed. Click the PENCIL icon on the right side of the profile to enter its settings. Then, flip the USES DEFAULT SETTINGS switch in the upper right corner to release this form from the default settings (learn more about this in our article on Custom Profiles).
Use the FORM PROMPTS editor tab to customize the questions you will want to ask your volunteers.
CUSTOMIZE PROFILE ITEMS
All registrants must checkout with at least one registration item in their cart (see HERE for more details on this system concept/requirement).
Generally, you can follow the same principles for a volunteer profile as you can for any other profile. If volunteers aren't signing up for anything in particular, just give them a single enhanced item to register for so they can checkout.
Otherwise, you can leverage Registration Items to add sign up options, such as:
- Meal attendance & preferences (i.e. vegetarian)
- Job time slots (i.e. Setup & takedown @ 5pm)
- T-shirts & size selector
KEY BENEFITS OF CREATING A CUSTOM PROFILE
- Reporting - able to leverage full scope of reporting tools for volunteers since they are registrants
- Communication Center - target volunteers with email & text utility
- Full Sign-Up Experience - provide volunteers with smooth registration process
- Mobile App Access - volunteer registrants get an Eventsquid account they can use for mobile access
- Easy Sign Up Changes - use all your existing admin tools to manage volunteers on the Dashboard
SIGN UP SLOTS
In the previous section, we mentioned using registration items in order to develop a way for volunteers to sign up for specific jobs / time slots. There are a few ways you can do this:
ENHANCED REGISTRATION ITEMS
The Enhanced Registration Item type automatically limits each registrant to a maximum quantity selection of one. With the Enhanced items, you can create an option for each individual time slot under each job.
In the example below, we used registration item groups to denote each job, then placed an item underneath each group for each available time slot for that job.
Notice in the upper left corner of the item's settings panel a "Limit of this item for the event". This allows you to set a limit on the number of people that can sign up for that slot.
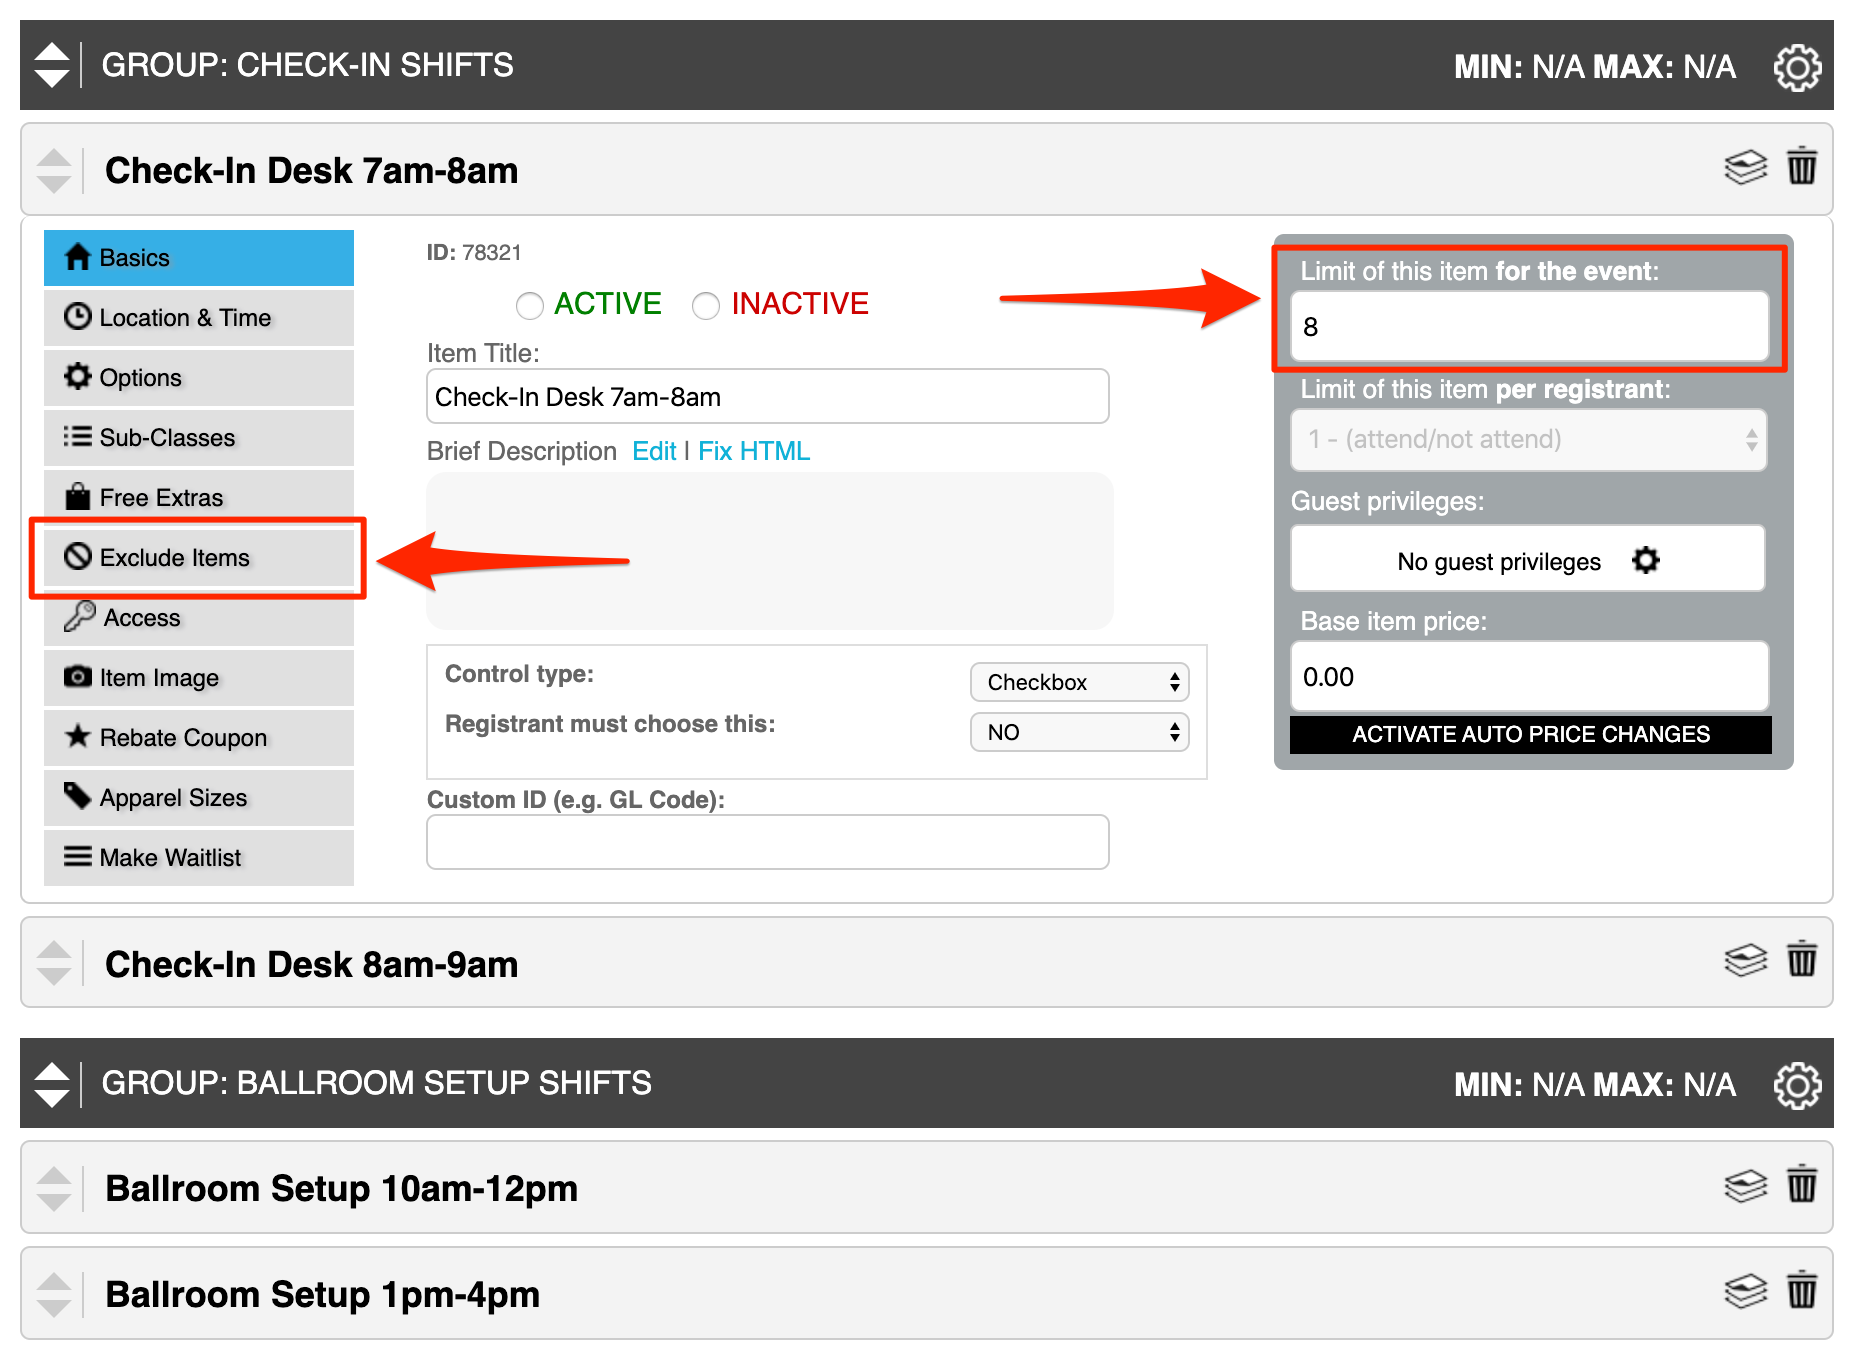
You might also consider using the Exclude Items tool, which would allow you to limit the number of slots a volunteer can sign up for (i.e. if you register for a check-in shift, you cannot register for a greeter shift at the same time).
EHANCED REGISTRATION ITEMS + SUB-CLASSES
Another valuable option within the Registration Items tool is the Sub-Classes mechanism. Sub-Classes allow you to create additional options that appear (to a registrant) in the registration form when that item is selected.
With sub-classes, you can try a couple different strategies, such as:
- Create items that represent jobs and sub-classes that allow time slot reservation
- Create items that represent time slots and sub-classes for job reservation
The choice depends on your business rules. Volunteer registrants cannot pick more than one sub-class PER ITEM. Thus, if you'd like a volunteer to be able to sign up for multiple time slots of the same job, you would have to build items to represent time slots. That way, a volunteer to select more than one [time slot] item and then go about picking their individual job.
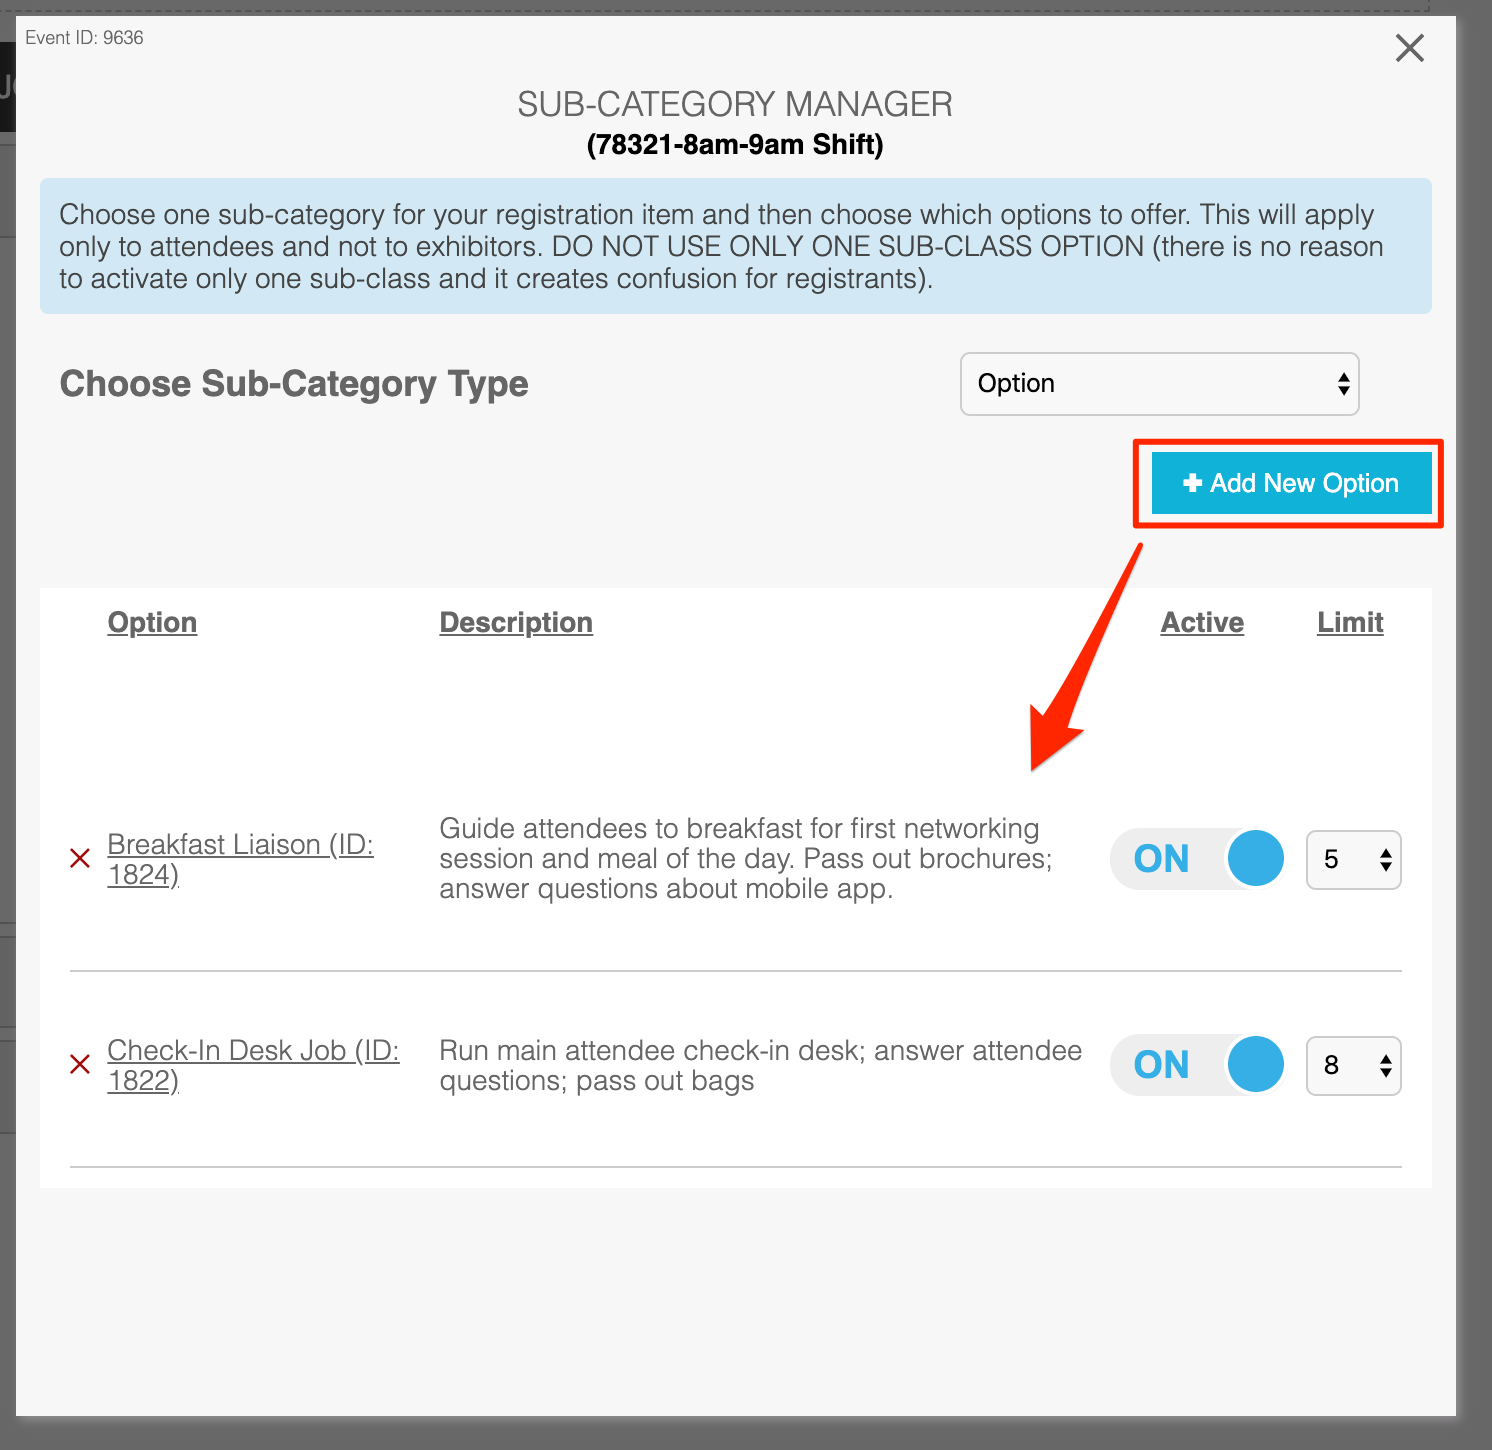
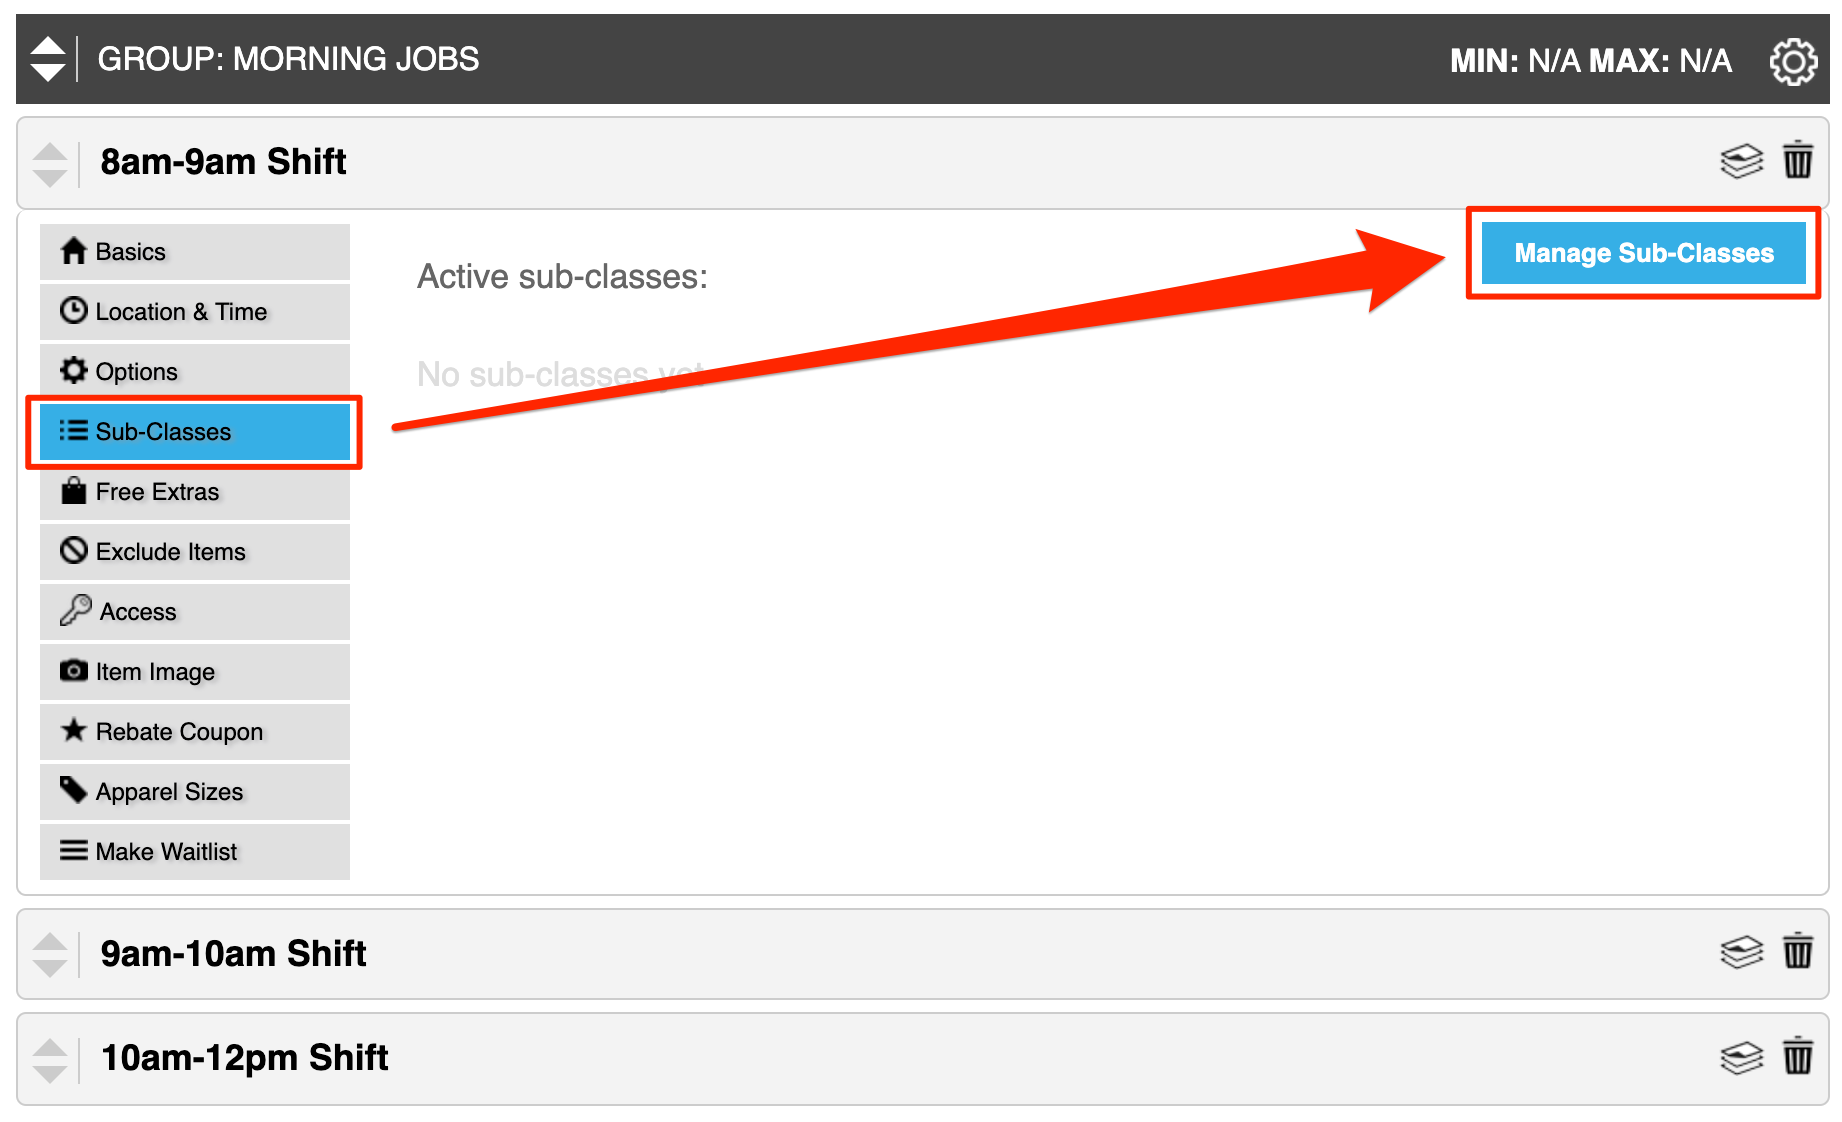
To add sub-classes to an item, click the Sub-Classes tab in the item settings panel, then click the Manage Sub-Classes button:
In the Sub-Classes menu, you can decide what category of sub-options you want to offer as part of this item. The first step is selecting the CATEGORY of sub-classes. In general, all sub-class categories fall into two buckets of behavior:
- SLOT: these can be activated across multiple items; when a specific time slot is picked by a registrant, the overall capacity limit goes down by one ACROSS all items that are using that particular time slot
- NON-SLOT: all other sub-class types can be activated under any item, but capacity limits for a particular sub-class can be unique to each item that the sub-class is activated under
Generally, we do NOT recommend using the SLOT sub-class type for this type of registration.
For example, let's say you are using items to represent jobs (screenshot above) and you provide a sub-class option for 8am, with a limit of 10 people. Let's say you also activate that same 8am time slot (sub-class) with a limit of 10 people underneath the Greeter job below.
If someone registers for an 8am slot as a Check-In Desk volunteer, you will now have 9 slots remaining in BOTH the Check-In Desk and the Greeter job. In other words, the sub-class limits are shared across items.
Instead, we recommend using a generic sub-class category, such as OPTION. Here, you can create your own custom sub-class options and tailor to your event needs.