
The Report Builder is your custom data solution in Eventsquid:
- Craft custom data reports and export to Excel and CSV
- Create templates to share amongst team members
- Save data layouts for reuse as your event progresses and captures more registrations
The Report Builder is intuitive and provides an interface that allows you to quickly load data layouts.
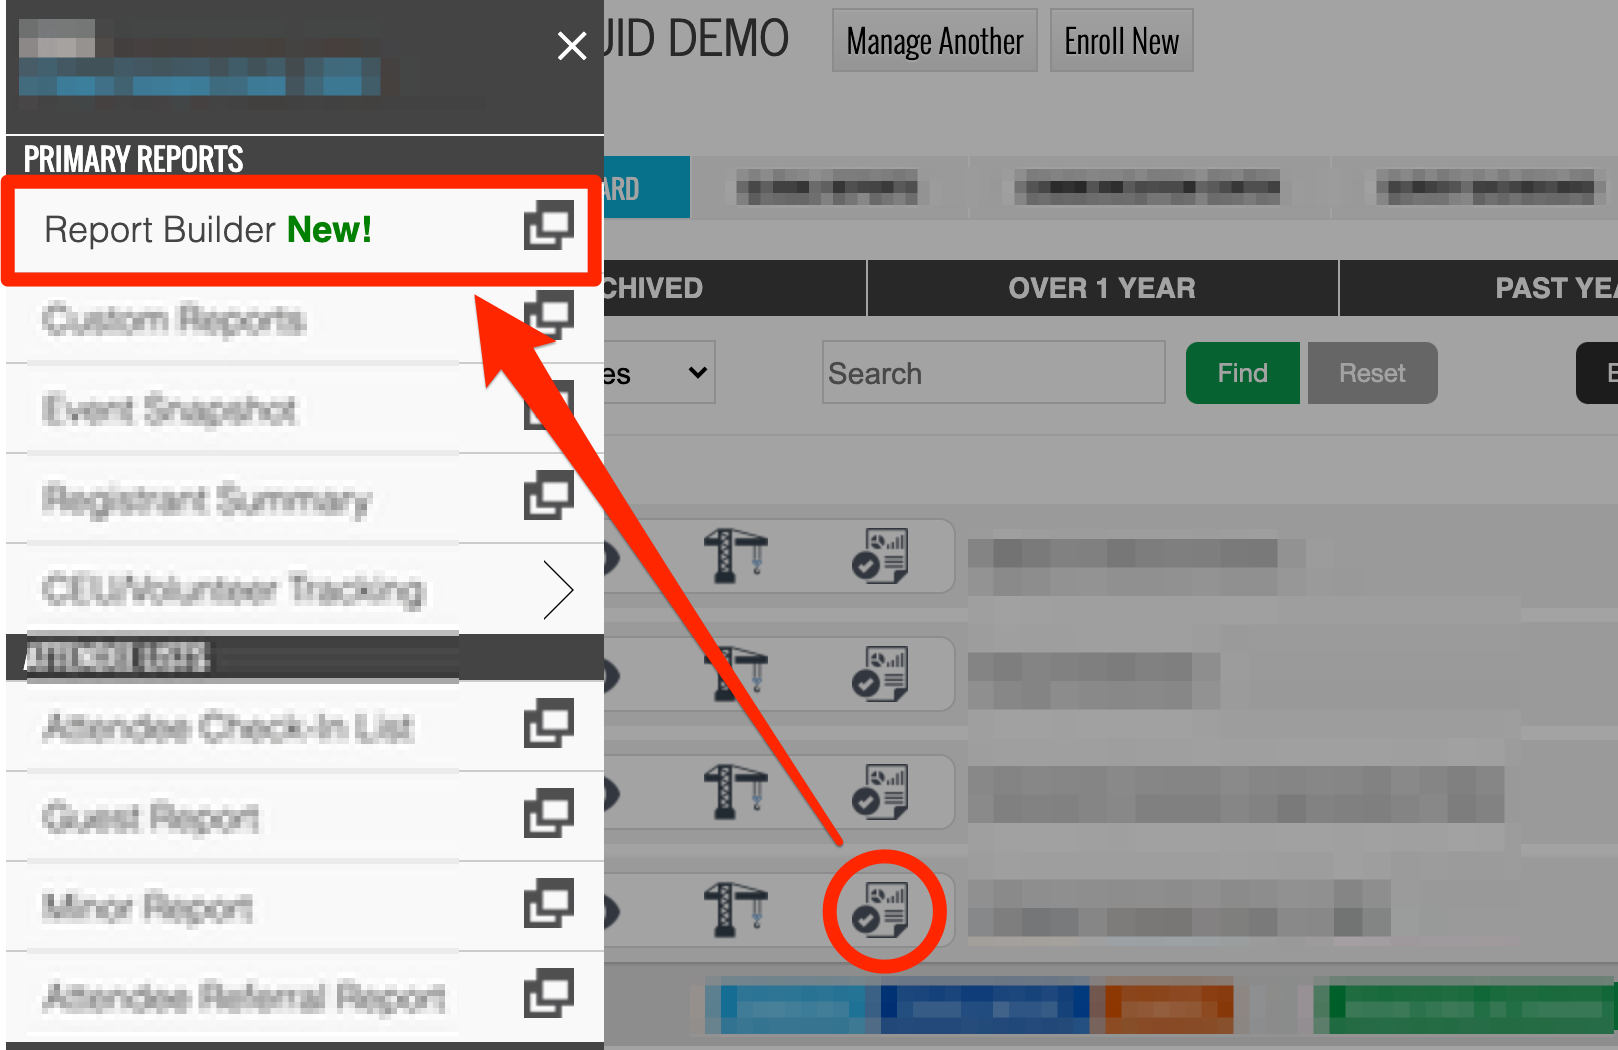
It is the successor to the Custom Reports tool and can be found on the Dashboard, within your event reporting menu:
HOW IT WORKS
When you create a new report, you will be placed into edit mode, where you can create a custom report.
There are 3 key components to the Report Builder:
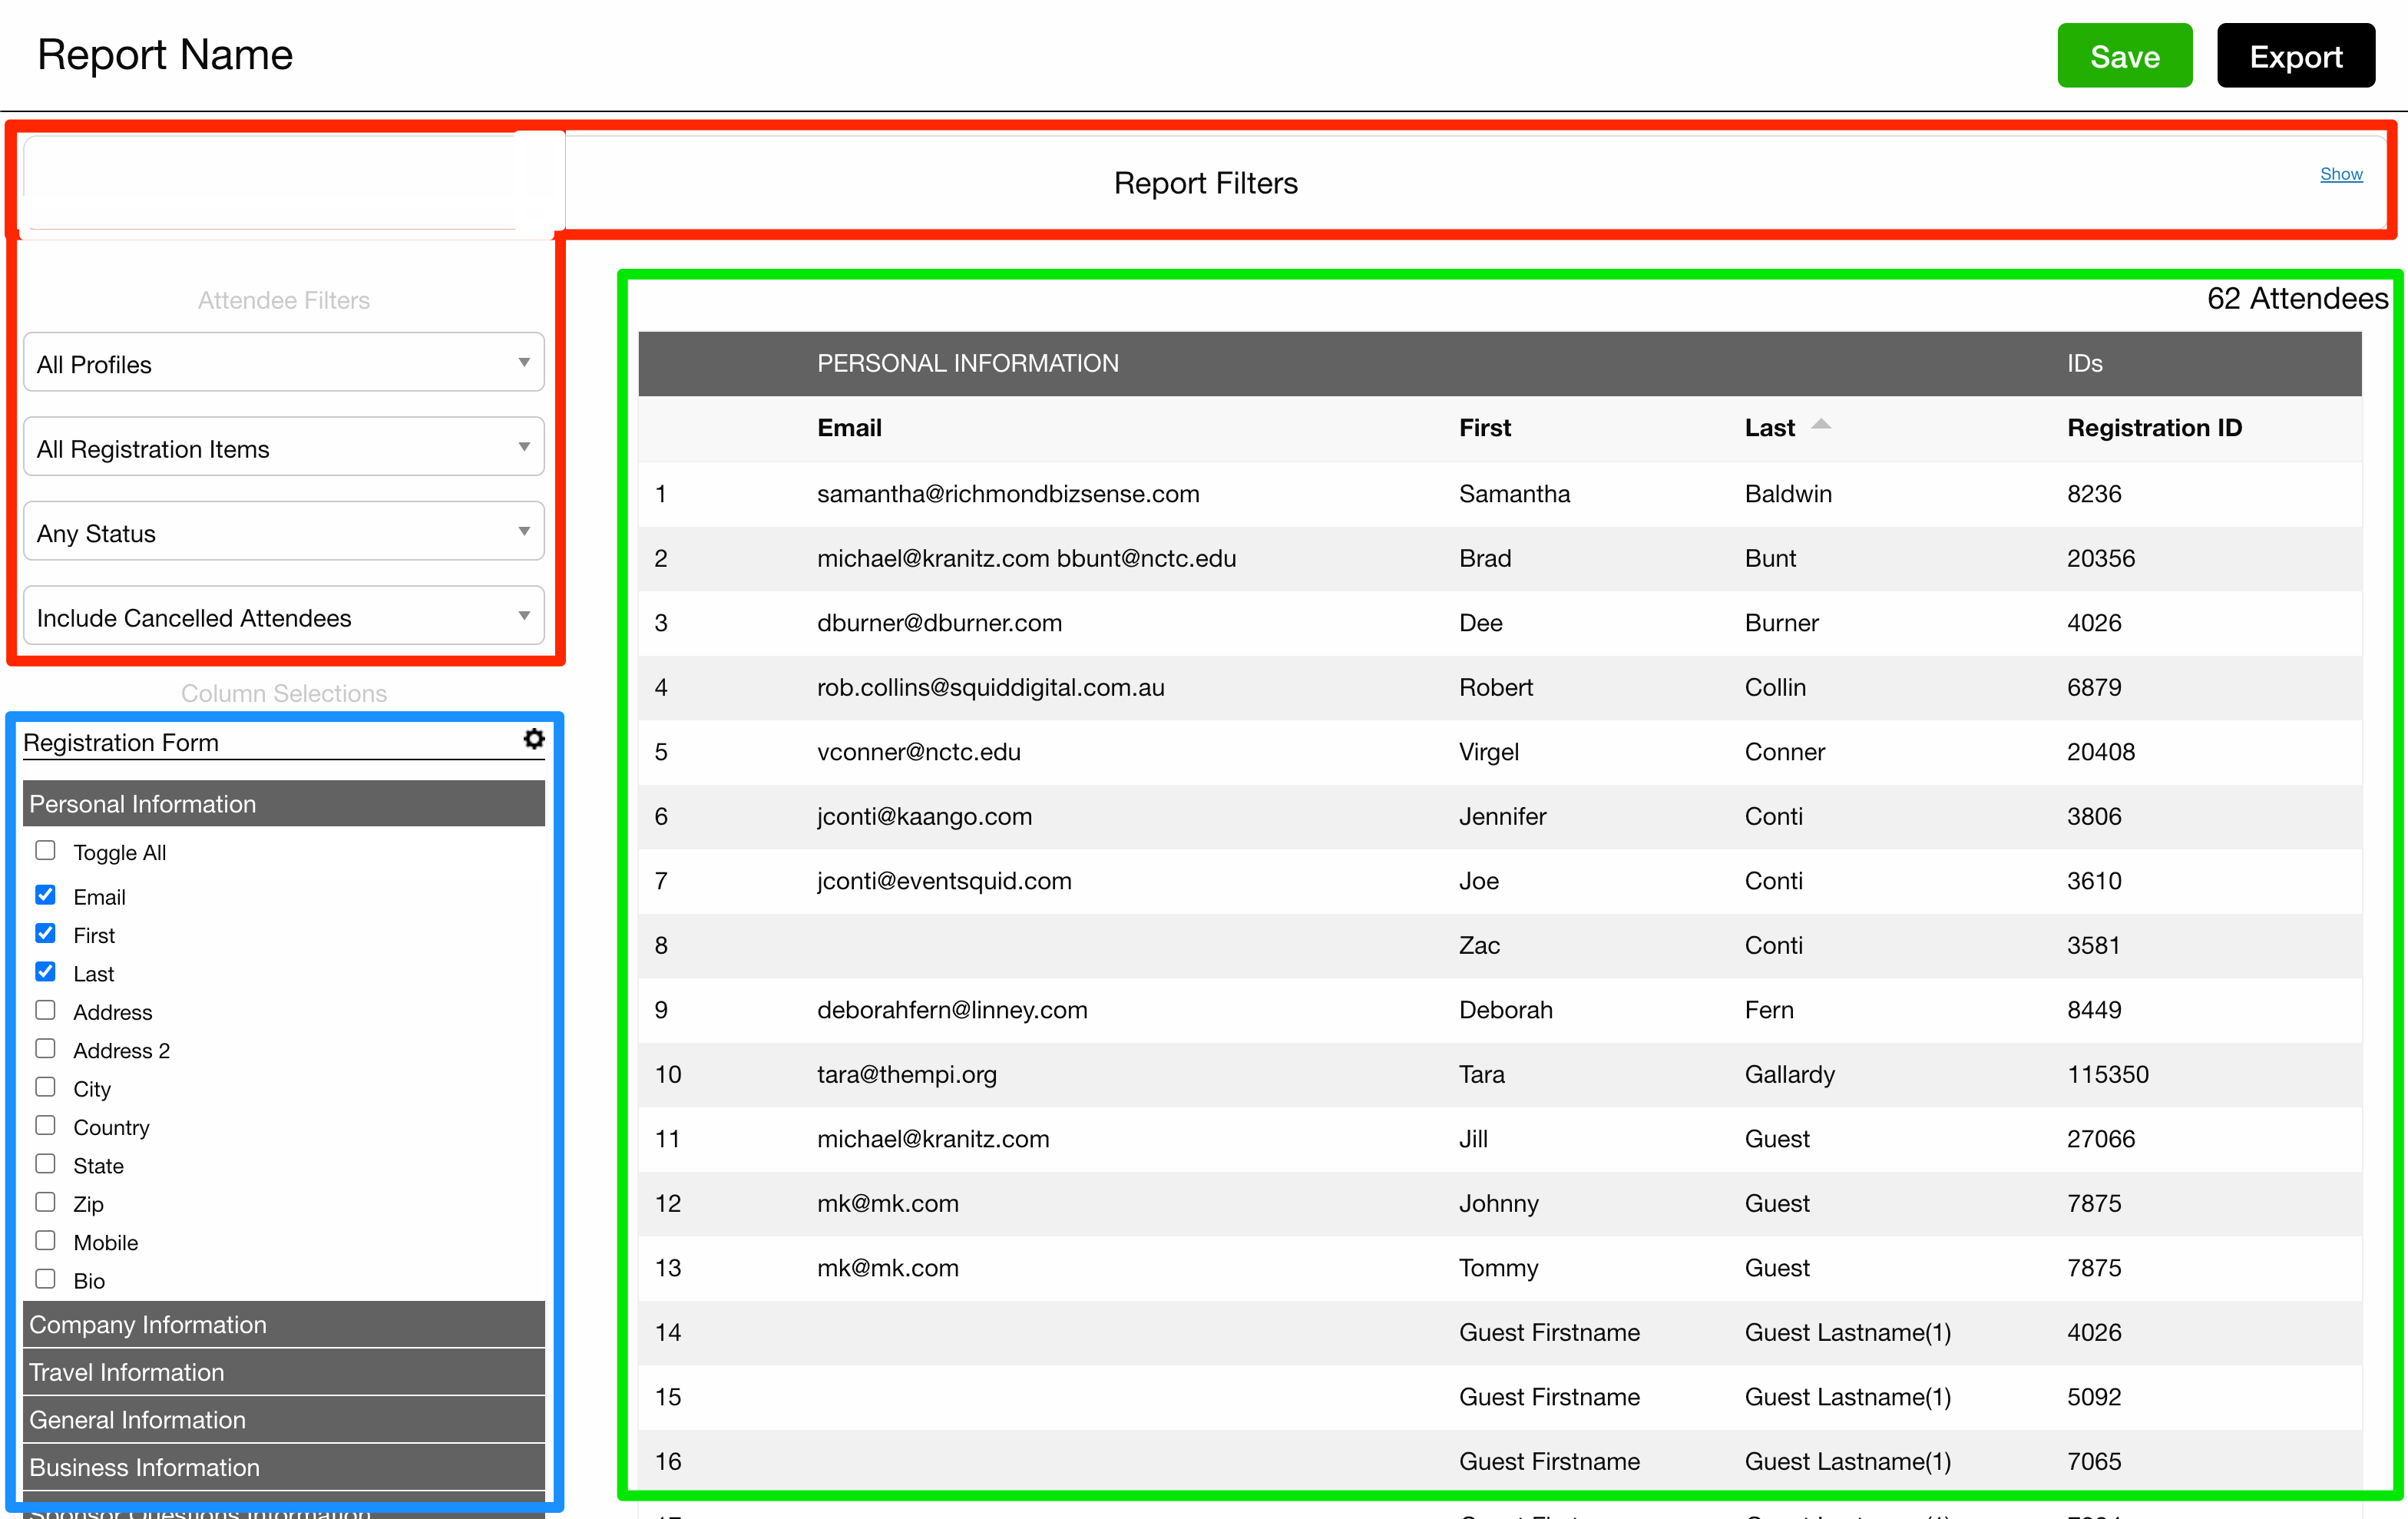
1. FILTERS: At the top you will have the opportunity to filter your dataset. In the upper left, use the drop down menus to designate one or more filters (based on Registration Profile, Registration, Application Status and Cancellation Status). At the very top, you can see which filters have been applied to your reports.
The ability to view which filters have been applied to your report can be extremely useful, especially if your reports are being shared across departments or submitted to other teams.
After exporting your report, the filers that have been applied to your report (if any) WILL show up in the end file.
2. FIELDS: The main menu on the left allows you to customize the data that is included in the report. Use the field selectors to designate which fields will show in your report.
The fields are broken up first by AREA:
- Registration Form - this area includes all custom form prompts that were asked during registration
- Financial - this area includes all data fields related to financial balance and payment status of registrants
- Registration Items - this item includes all registration items that were offered on the form
- Table Assignments - if using the Table Assigner Utility, you can choose to show table assignments in your report
- Other - this area includes various admin and registration identification fields
Within each area, there are sub-categories if applicable. For instance, registration items are broken out by the type of item (i.e. Enhanced, Activity, Goods/Services, Meals, Other).
Finally, items and prompts are separated by the groups they are assigned to in the Event Builder.
With this segmented layout, it is simple to locate the specific data fields you are looking for!
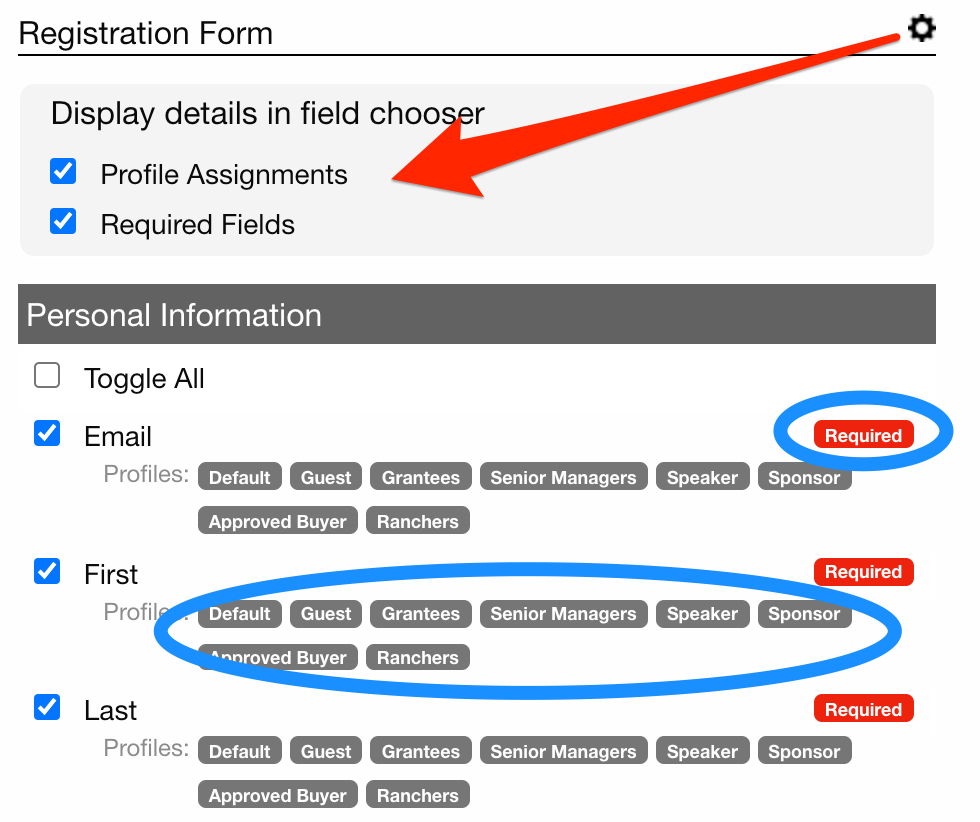
Within the Fields area, the REGISTRATION FORM and REGISTRATION ITEMS areas have additional settings. You can open their additional settings by clicking the small gear icon to the right of the area header.
The REGISTRATION FORM area settings allow you to flag the prompts within that section that are set to Required status on the registration form; you can also display which Registration Profiles each prompt belongs to:
The REGISTRATION ITEMS area settings allow you to customize the attributes about registrations that are displayed in the report output:
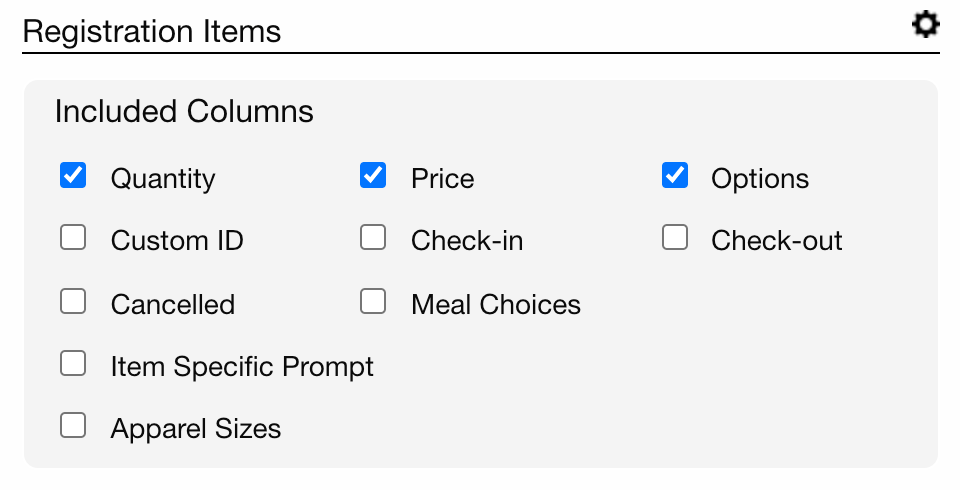
Each setting will show a different attribute of any registration item that is included in the reporting output. For instance, the QUANTITY setting will show the quantity selected by each registrant for all items that are included in the reporting output.
CHECK-IN will show the check-in time stamp that a registrant submitted for all registration items that are included in the reporting output.
3. OUTPUT: The central portion of the Report Builder will show you the current data layout you have generated.
After each change to the data layout (by either selecting or de-selecting fields), you will be asked to refresh the report so that the new data can be generated.
The reason for this is to keep load times extremely fast and efficient. Only when you're ready, will the system load the data output that you've built.
SAVING & SHARING REPORTS
When you have perfected your report, click the SAVE button in the upper right corner. A dialogue box will appear requesting you to submit your save settings:
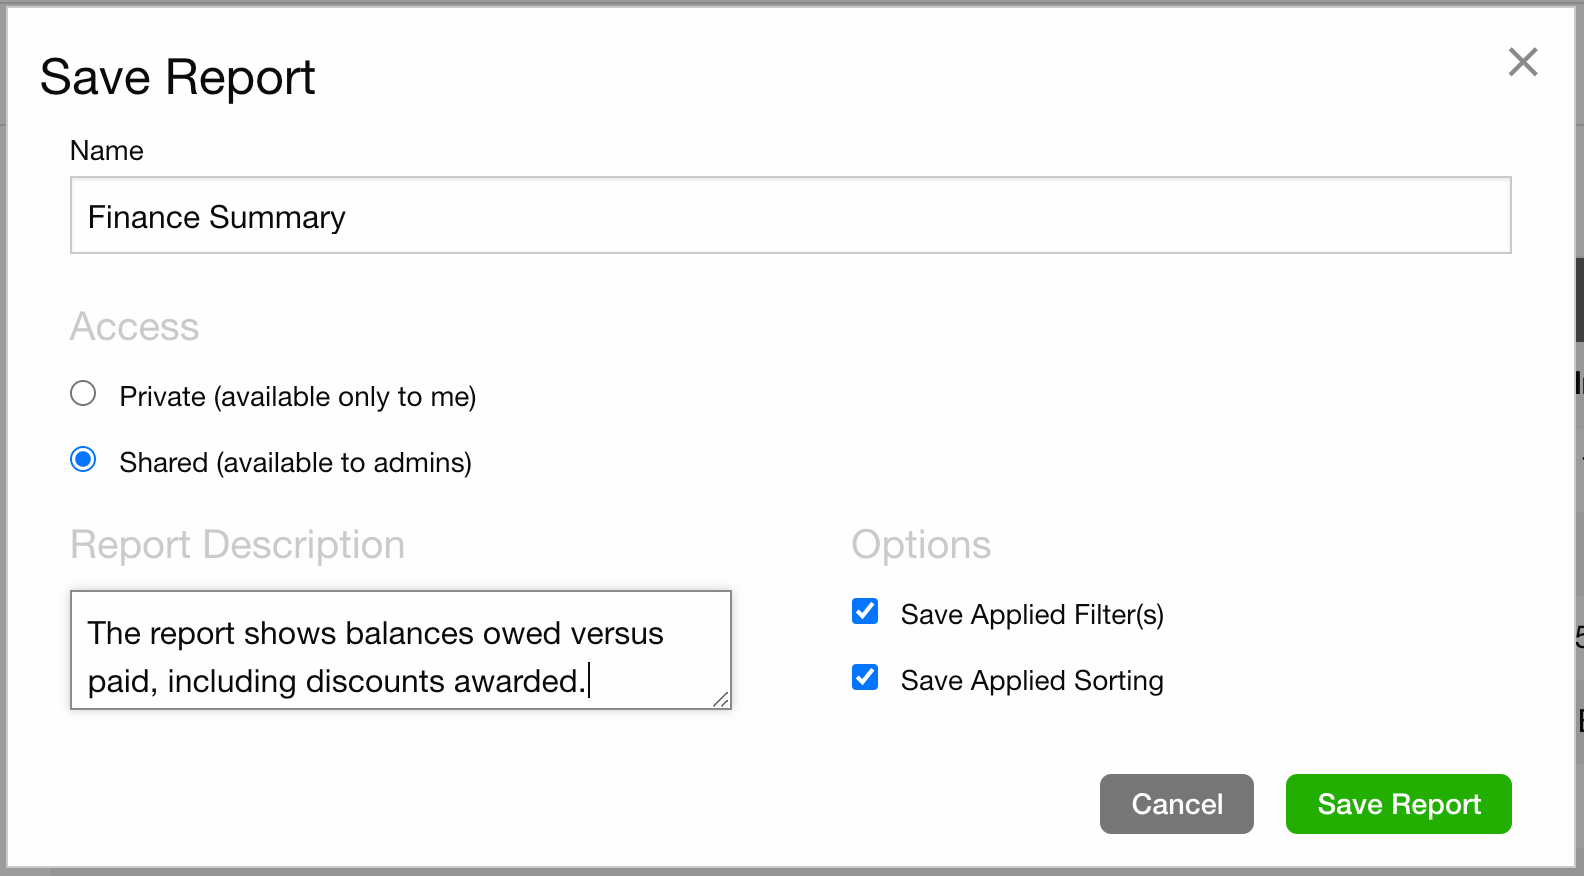
The dialogue box will request:
- The name and description of the report
- Access settings of the report (private or shared)
- If you would like to save the filters and column sorting so that they are loaded upon reopening the report next time
ACCESS & REPORTING SHARING
The Report Builder allows you to share your reports. When saving the report, make sure you set the Access option to SHARED.
Once this is done, other admins in your organization can view your reports.
NOTE: Sharing a report means that other admins can ONLY VIEW the report, they cannot modify the report. ONLY the creator of the report can modify the report settings and layout.
Once the report is shared, other admins can access the report in VIEW MODE. The admin must simply visit the Dashboard, access the Report Builder tool from the reporting menu (on the specific event), then click the name of the report.
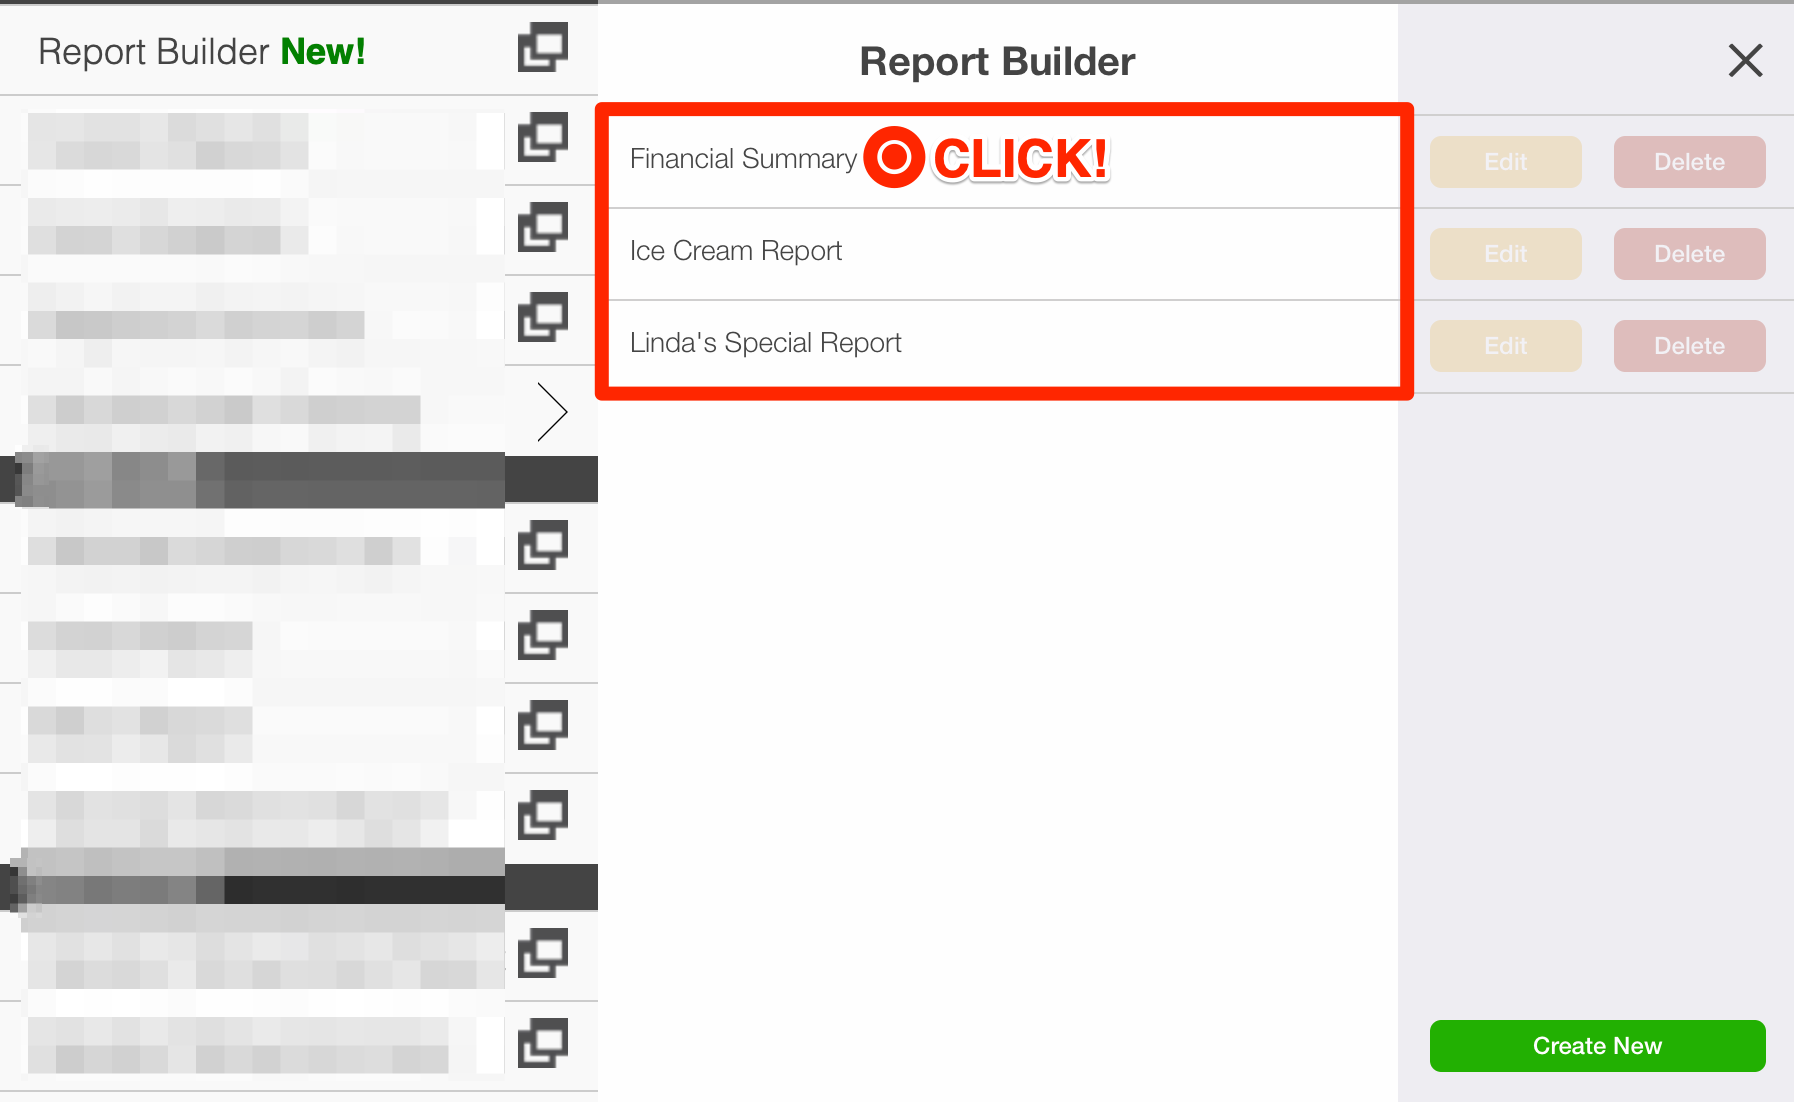
Once within the report, the admin can view the report and export to Excel/CSV:
